Setting up a late model laptop with a clean install of Debian I ran into a problem. The laptop's network card is a Killer AX1650, the drivers for which don't come pre-loarded with the Debian netinstaller. The laptop also doesn't have an Ethernet port, and I had no way of connecting it to the internet during the installation of Debian. Getting the internet working was something of a chore... but not impossible!
The Killer directions for this situation are a good place to start, however they make some assumptions about what you'll have installed and from where you're going to get them. For instance, on my first attempt I didn't perfectly match the kernel of the machine I was downloading packages with (4.19.0-5), and the netinstaller's kernel (4.19.0-6). Here's my mini saga on overcoming such problems!
First, we need to install drivers for the wireless card. Then we'll need to install the minimum required software to connect to a wireless network (WPA in this case). And all of this needs to be done by copying files from one machine to the other. To this end, I've included a brief overview of mounting and unmounting USB drives in Linux.
Installing the Killer AX1650 Drivers:
Requirements:
- A machine with internet access and the exact same kernel version as the one you're installing. Using the same installation media or at least updating the installation media to the newest version should sort you out.
- Some kind of storage like a USB drive to copy files between the two machines.
- Some patience.
Basically, we'll follow the Killer instructions, but in addition to the dependencies they use apt to download, you'll also need the following:
binutils libmpc3 cpp-8 libmpfr6 g++-8 patch gcc-8 perl libisl19 binutils-common binutils-x86-64-linux-gnu libbinutils libgcc-8-dev libperl5.28 libstdc++-8-dev perl-modules-5.28 libasan5 libgdbm-compat4 libgdbm6 libubsan1Having installed these and followed the rest of the instructions, building the drivers will still fail due to lack of the kernel headers. You'll need the following as well:
linux-compiler-gcc-8-x86 linux-headers-4.19.0-6 linux-headers-4.19.0-6-common linux-kbuild-4.19These will obviously need to be the right ones for you system. Check with uname -r. This is a common shorthand for download the right headers:
$ apt download linux-headers-$(uname -r)Having installed these as well, you'll now be able to build and install the killer drivers.
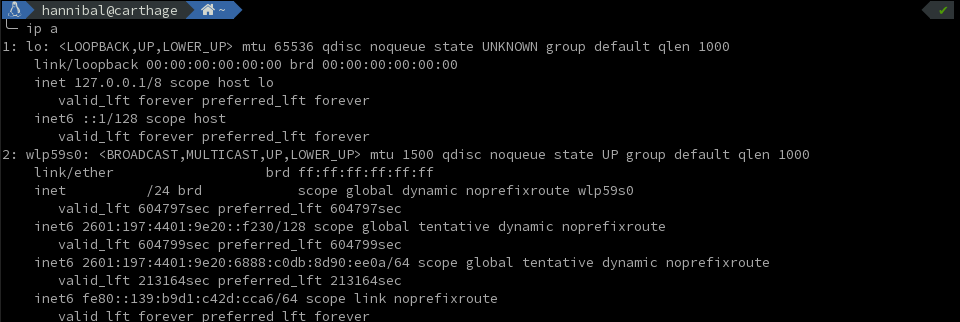
After the recommended reboot, you should see your a WiFi device:
$ ip a
Looks like it's called wlp59s0. You should be able put it 'UP' (ie. on) with:
$ ip link set wlp59s0 up
Great!
Connecting to WPA WiFi:
After all this work, we still need to actually use of the card to connect to the Internet so we can stop copying files around. Assuming your network isn't open or WEP, you'll need wpasupplicant to connect to your WiFi. The following will be required to install it, and you can download them the same way suggested by the Killer instructions (ie. with apt download):
adduser libc6 libdbus-1-3 libnl-3-200 libnl-genl-3-200 libnl-route-3-200 libpcsclite1 libreadline7 libssl1.1 lsb-base wpasupplicantNow we'll create a wpa_supplicant configuration file. This is temporary, so your home folder is a fine place to save it. Be careful of special characters and spaces. (In Bash, strings in double quotes are interpreted, while single quoted strings are not. You can also escape spaces with a blackslash):
$ wpa_passphrase 'NetworkSSID' 'NetworkPassword' > /location/to/save/wpa_supplicant.confNow we can attempt to connect with wpa_supplicant:
$ sudo wpa_supplicant -c /location/of/your/wpa_supplicant.conf -i <interface_name>The output of dmesg -Hw could be pretty helpful in figuring out what's going on here. If you see a CONNETED event we're almost there.

Now we just need an IP. Assuming your network is handing them out via DHCP, use the following:
$ sudo dhclientGood to go!

Setting up the Correct Apt Sources:
Finally, the only source that the netinstaller of Debian sets up when it can't connect to the internet during install is the security repo. This is of course good, but we also need the main repo. Add the following two lines to /etc/apt/sources.list:
deb http://deb.debian.org/debian buster main contrib
deb-src http://deb.debian.org/debian buster main contrib
Now we can run apt update and (for example) FINALLY get ViM!
Good Luck!
On Mounting Drives:
Mounting and unmouting a USB device in Linux can be done quickly as follows. Remember not to just unplug devices willy-nilly. In the long run it saves time.
Find the location of a plugged in drive with lsblk. The path is likely something like /dev/sda2 where the 2 refers to the partition number. Mounting a drive:
$ sudo mkdir /media/my_drive
$ sudo mount /dev/sda2 /media/my_drive
If your using an fancy file system, or if it's journaled or something, you may need a couple mount options. For instance, journaled HFS+ drives can be forcibly mounted as read-only like this:
$ sudo mount -t hfs -o force,ro /device/partition /media/my_driveUnmount drives with umount. In order for successful unmounting, the device can't be in use, or 'busy'. Close any file managers which are looking at the mount, or navigate out of the directory if in a terminal.
$ sudo umount /media/my_drive
